-
DevOps Pipeline Git Repository stages now connect to any Git server that speaks HTTPS — GitLab, Bitbucket, Gitea, or a self-hosted instance — not just GitHub and Azure DevOps.
Previously, Git integration only worked with those two providers. If your team backs up flows to a self-hosted GitLab or an on-prem Bitbucket, you were stuck. Now you can point a pipeline at any HTTPS Git repository to back up and deploy your flows.
For servers that use a private certificate authority, you can paste in a CA certificate so FlowFuse trusts the connection — no infrastructure changes required.
To get started:
- Go to Team Settings → Integrations → Add Token.
- Choose Other, then enter the repository username and a personal access token (or app password).
- If your server uses a private CA, paste its certificate into the CA Certificate field.
- Add a Git Repository stage to a pipeline, select your token, and enter the repository URL.

This feature is available to Team and Enterprise tier users of FlowFuse Cloud and Enterprise Licensed Self Hosted users from v2.32.
-
Device Agent v4 is a major release. It brings a modern Node.js runtime, structured logging for production observability, a new authentication method, and a more secure container deployment model. There are breaking changes - check the upgrade notes before updating your remote instances.
Node.js 22 is now the default runtime
The Device Agent installer and official Docker image now default to Node.js 22. Node.js 20 reached end-of-life in April 2026, and continuing to ship it as the default would leave devices running on an unsupported runtime without security patches. It is also the minimum version required by Node-RED v5.
Breaking change: The Device Agent Docker image tagged
latestnow uses a Node.js 22 base image. If you do not pin your container image to a specific version tag, review your deployment configuration before upgrading.We also continue to build, and tag, containers for a range of Node.js versions - 18, 20, 22 and 24.
If you use the Device Agent installer, it will now default to Node.js 22. Existing installations using the installer will need to download the latest version and re-run the installer.
Containers now run as an unprivileged user
The Device Agent Docker container no longer runs as the root user. Following best practices, processes inside the container now execute as an unprivileged user.
Breaking change: If your container deployment mounts volumes or relies on file permissions set for the root user, you'll need to update those permissions to match the new unprivileged user.
More details are available in the Device Agent readme.
This is a security hardening change with no functional impact on normal Device Agent operation.
Structured JSON logging
The Device Agent now supports a JSON logging format, selectable via the
--log-format jsonCLI flag.Previously, all agent output was plain-text - readable in a terminal but difficult to ingest reliably into log aggregation tools like Grafana Loki, Elastic, or AWS CloudWatch. Parsing unstructured log lines with regex is fragile and breaks whenever the message format changes.
With JSON logging enabled, every log entry is a machine-readable object with consistent fields. Pipe agent output directly into your existing observability stack without any custom parsing rules.
device-agent --log-format jsonBearer token authentication
The Device Agent now supports bearer tokens as an authentication method for HTTP endpoints, alongside the existing credential model.
This allows you to create HTTP endpoints in your Node-RED flows that can be accessed securely by other applications without needing to manually authenticate first. This is a capability we've had in Hosted Instances for a while - this release makes it available to Remote Instances as well.
You can configure the tokens via the FlowFuse dashboard for your remote instance under the
Settings->Securitysection. Enable theFlowFuse User Authenticationoption, then you can create and manage the tokens.This requires the FlowFuse v2.32 release, coming later this week, when running in a self-hosted environment, but already available on FlowFuse Cloud.
Editor theme fix
A bug caused the FlowFuse editor theme to fail to load in certain configurations - particularly when switching between Node-RED 5 and legacy versions. This is now resolved. The correct theme loads regardless of which Node-RED version the device is running.
Upgrading to v4
Before upgrading, check the following:
Docker users: The
latestcontainer image now uses a Node.js 22 base and runs as an unprivileged user. Review volume mount permissions and update any configurations that assume a root user or an earlier Node.js version. Details available in the Device Agent readme.Installer users: Download the latest version of the installer and re-run it if you want to stay aligned with the new default.
Device Agent v4 is available now. Update via the Device Agent installer or pull the latest Docker image.
-
As part of our ongoing efforts to maintain our infrastructure, we need to update some of our servers that host Node-RED instances.
This will require restarting any hosted Node-RED instances running on those servers, leading to a short downtime whilst they restart. Remote instances on the edge are unaffected.
We will complete this migration during a 3 hour maintenance window starting at 8am UTC on Saturday 11th July 2026.
Will my instances be affected?
If your instance was created after 15th June 2026, or has been updated since that date, it will already be running on the new servers.
Otherwise, you can take action to migrate your instance before the scheduled maintenance window at your own convenience.
If you manually suspend and restart your instance, or apply any pending upgrade any time before the maintenance window, your instance will not need to be restarted and no further action will be needed.
You can find the "Suspend" option from the "Actions" drop down menu on the Instance Overview page. Once the Instance reports being in the Suspended state, you can select "Start" from the same drop down menu.
We will be emailing notifications to all team owners who have instances that require a restart.
Enabling Scheduled Maintenance Mode
Keeping instances up to date is an important task to ensure they are running with the latest features and security fixes. FlowFuse provides the ability to select a time for updates to be automatically applied to your instances. You pick which day of the week and time the platform can schedule updates in. This removes the burden for keeping things up to date.
On FlowFuse Cloud, Starter teams already have this feature enabled for their instances to apply updates at the weekend.
Pro and Enterprise teams can opt-in on the Instance Settings - Maintenance page.
More information is available in the scheduled maintenance changelog entry.
-
FlowFuse now has a dark mode. 🦇 You can switch the whole app between Light, Dark, and System from your User Settings.
A bright white UI is fatiguing in low-light control rooms or on a night shift. Dark mode lets FlowFuse fit those environments.
By default, FlowFuse follows your operating system and flips live when it changes. Pick Light or Dark to lock it in — FlowFuse remembers your choice per browser.

To change your theme:
- Open User Settings
- Under Theme, choose Light, Dark, or System
- Save
A note on scope: dark mode covers the FlowFuse application itself. The embedded Node-RED editor and Dashboard iframes keep their own themes — Node-RED and your Dashboard configuration manage those separately.
This feature is available to all FlowFuse Cloud users and all Self-Hosted users from v2.32.
-
You can now turn off AI features for your team from the team settings page. When disabled, FlowFuse removes the Expert Assistant, inline code completions, and snapshot description generation for your team. Running instances will need a restart for the change to fully take effect.
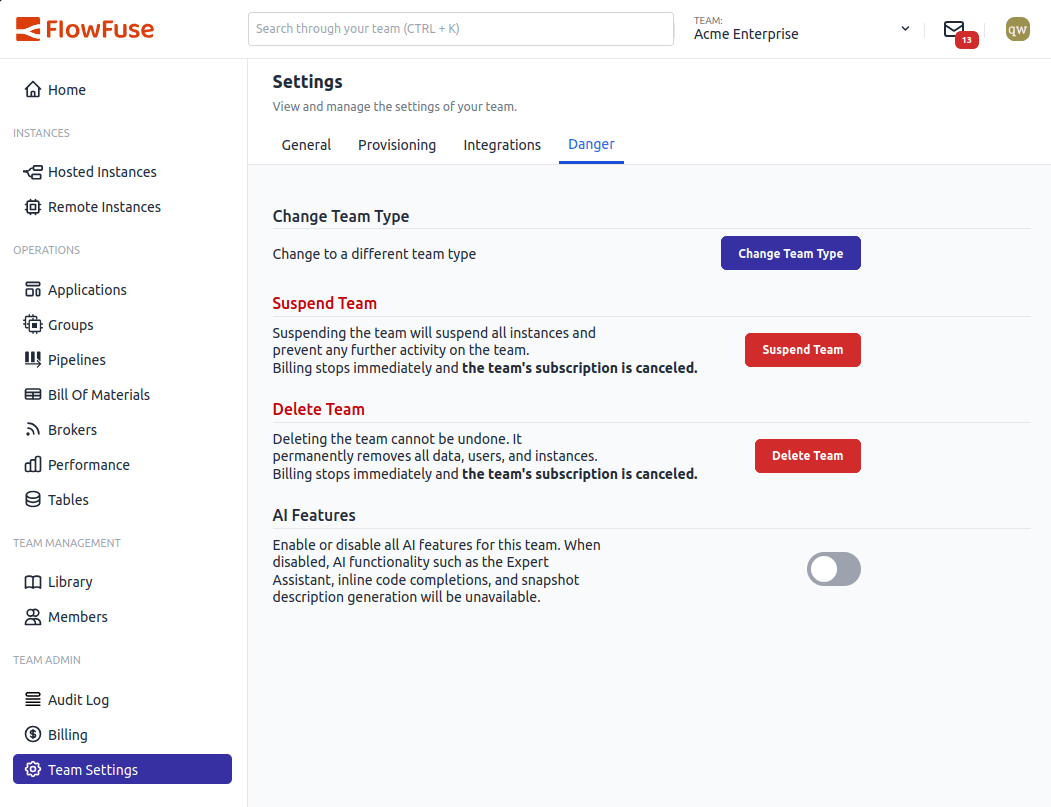
Opt out of AI features from the Danger section in team settings.The toggle is on by default for all teams. Flipping it off shows a confirmation dialog so you don't accidentally disable it. If you change your mind later, just flip it back on.
Self Hosted Enterprise customers also get platform-level and team-type-level AI controls, so admins can control AI availability across the entire installation or per plan before it ever reaches team owners.
This feature is available to all FlowFuse Cloud users and Enterprise Self Hosted users from v2.31.
-
When running self hosted FlowFuse or embedding FlowFuse in a solution it may be required to send all user authentication requests to a single SAML SSO provider, rather than using the users email domain to pick the correct provider.
With the release of FlowFuse 2.30.0 it is now possible to pick a configured provider and all unauthenticated users will be automatically redirected to this provider.
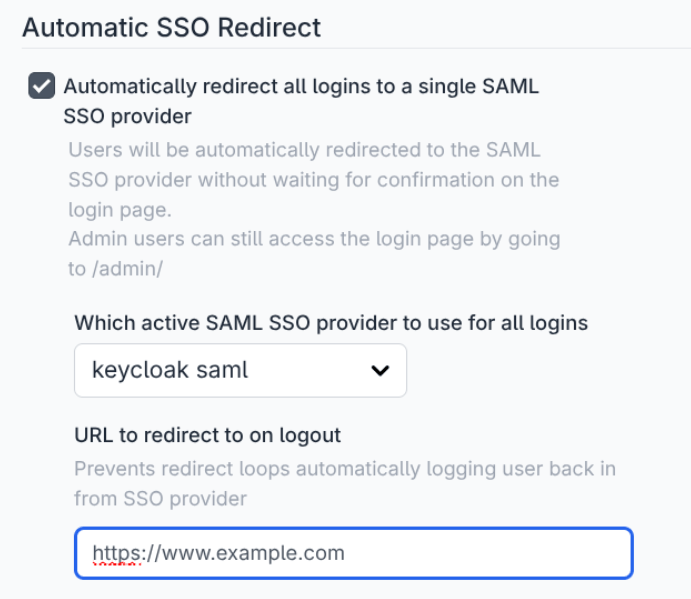
To prevent administrator lockout in the event of a SSO failure, admins can by pass this redirect and enter their normal username and password by accessing any page on the admin route, e.g.
https://forge.example.com/adminDocumentation is found here
This feature is only available to Self Hosted Enterprise licensed FlowFuse Instances.
-
FlowFuse Expert Builds Your Application
Cloud All tiersSelf-Hosted Enterprise (contact us)You can now describe what you want to build, and the FlowFuse Expert will assemble it for you directly on your Node-RED workspace. It adds tabs, drops in nodes, wires them together, and configures their properties, to help get you up and running.
Previously, the Expert could answer questions, suggest changes, and act on links you clicked. Turning those suggestions into a working OEE dashboard, MES handover screen, or Modbus-to-UNS bridge still meant placing every node and wire by hand. Now the Expert does that work for you, and you keep iterating in chat to shape the result around your real-world setup.
Agentic Node-RED development is rolling out as a soft launch so we can fine-tune the experience before opening it up more widely. It is available on request to FlowFuse Cloud Starter, Team, and Enterprise teams from v2.30. Self Hosted enablement follows shortly.
Contact us to enable agentic Node-RED development for your FlowFuse Cloud team.
-
Customisable Immersive Editor Drawer
Cloud All tiersSelf-Hosted All tiersThe drawer in the immersive editor used to float over your canvas, blocking parts of your flow whenever it was open. Now it sits inside the editor layout, so FlowFuse tools stay visible alongside your work in Node-RED. You can also set it up the way you like, and it stays that way every time you come back:

- Pin the drawer to dock it alongside the canvas, and the Node-RED editor resizes to fit.
- Switch sides to move the drawer to the left or right of the screen.
- Go full-screen to hide the FlowFuse topbar and give the canvas maximum space.
- Resize the drawer to whatever width works best for you.
The drawer opens by default the first time you visit the editor. After that, your browser remembers your choices between sessions.
This feature is available to all FlowFuse Cloud users and Self Hosted users from v2.30.
-
When interacting with the FlowFuse expert, you might be asked to search flows, select a node, or edit a node. Previously, this was presented as a set of text instructions. As of today, whenever possible, the Expert will provide clickable action links that will perform the operation for you.
This feature requires Node-RED Assistant v0.12.0 or later.
This change is live on FlowFuse Cloud. Self-Hosted users will receive it in the next release (v2.29).
-
Your hosted instance now knows its own URL. The
FF_INSTANCE_URLenvironment variable is automatically available to your flows, so you can reference the instance's address without hardcoding it.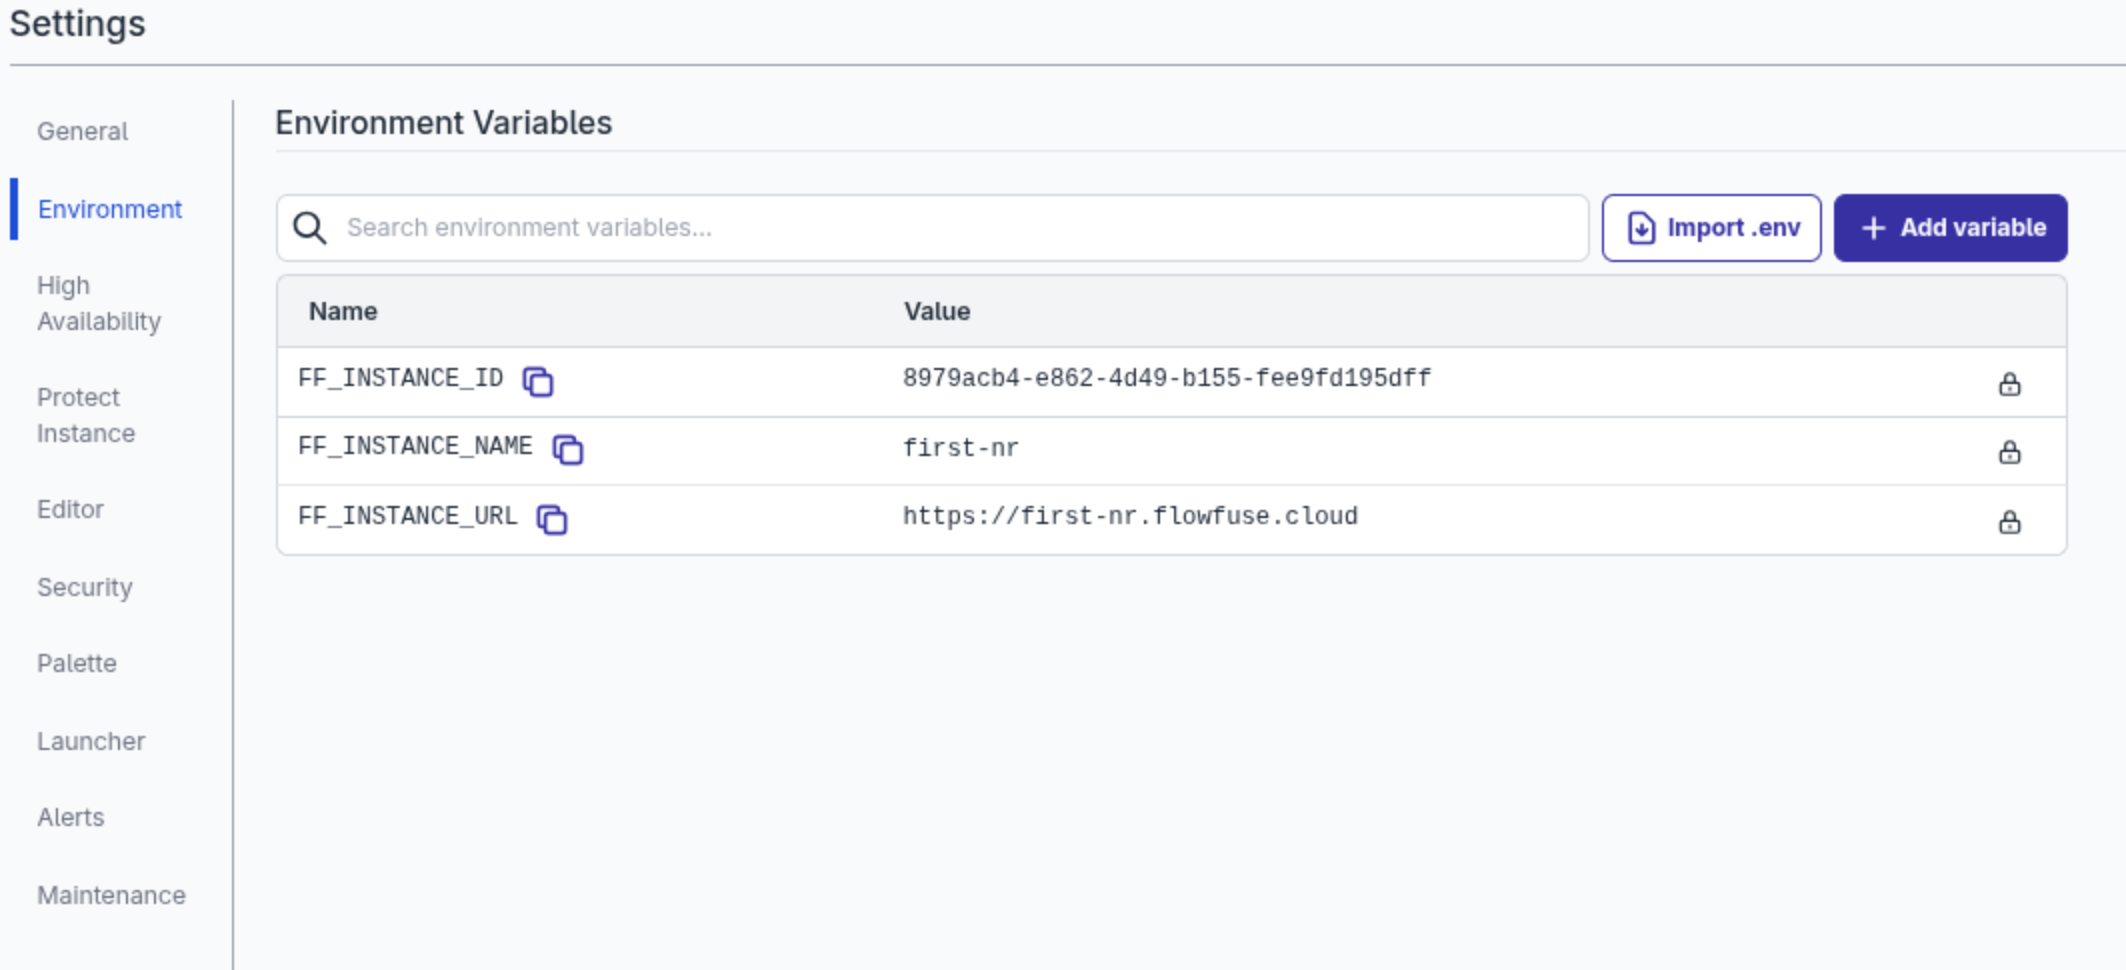
For Hosted Instances with a Custom Hostname that will be returned rather than the default Instance hostname.
Existing instances will need to be restarted to pick up the new Environment Variable.
This will be available to Self Hosted users from v2.29.0
-
Richer snapshot comparison view
Cloud Pro+Self-Hosted All tiersPreviously, comparing snapshots only showed the two flow canvases overlaid at different opacities. You could see that something had changed, but not what or where.
Now when you compare two snapshots, a sidebar lists every changed, added, and deleted node. You can step through them one at a time — the canvas highlights and scrolls to the relevant node automatically. For each change you can see:
- Property diffs: each changed property is shown inline with the old and new value side by side.
- Code diffs: for function and template nodes, code changes appear as a line-level diff with red for removed lines and green for added — the same format you'd expect from a git diff.
Use the Prev / Next buttons or the ← → arrow keys to navigate through changes.
For the first time, teams can review a snapshot diff before deployment and actually trust what they're seeing — not just look at it.
This feature is available to all FlowFuse Cloud and Self Hosted users from v2.29.
-
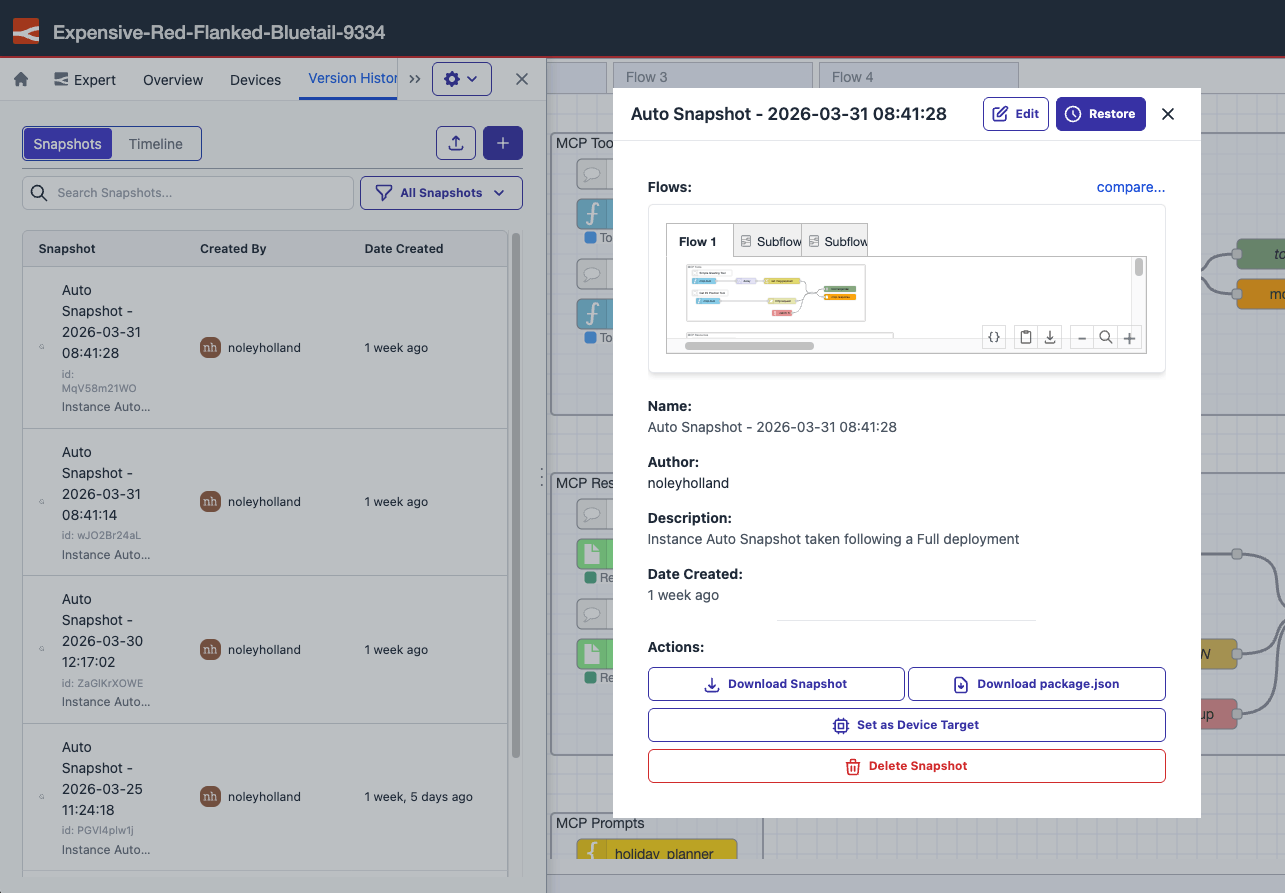
View Snapshot Details in the Immersive Editor
Cloud All tiersSelf-Hosted All tiersYou can now open snapshot details from inside the immersive editor. Previously, clicking a snapshot from the Version History timeline or Snapshots list had no effect in the editor — the detail view was only available from the instance page in FlowFuse.
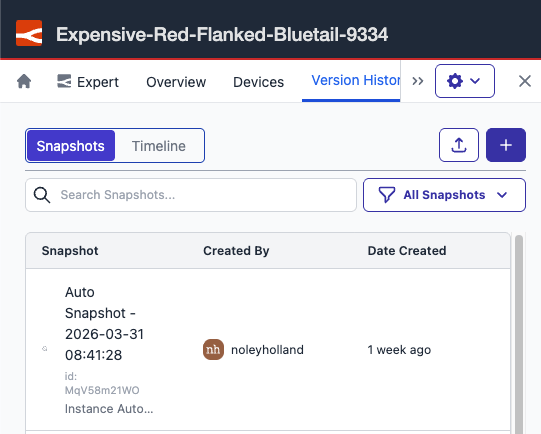
Snapshot details now open in a modal inside the immersive editor, so you can review and manage snapshots without leaving your editing session. The modal contains the same information as the snapshot detail view on the instance page.
This feature is available to all FlowFuse Cloud users and all Self Hosted users from v2.29.
-
The Developer Mode tab is now available directly in the immersive editor drawer when working with remote instances. You can toggle auto snapshot and create snapshots without leaving the editor.
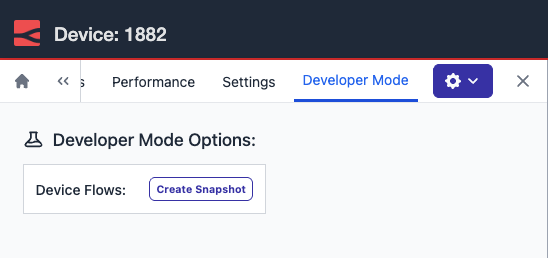
Previously, accessing Developer Mode meant opening a second browser window and navigating to the standalone device view — breaking your flow inside the editor and adding unnecessary friction, especially when working through a staged dev, test, and promote rollout.
This feature is available to Enterprise tier users of FlowFuse Cloud and Enterprise Licensed Self Hosted users from v2.29.
-
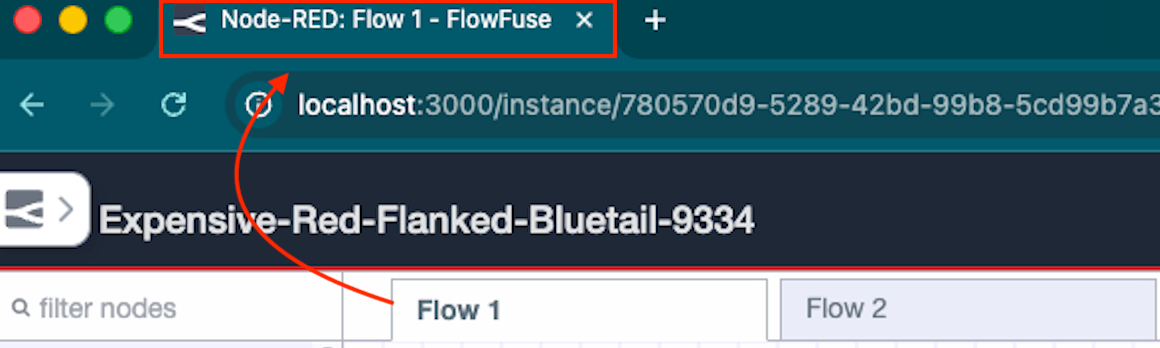
Embedded Editor Now Shows Active Tab
Cloud All tiersSelf-Hosted All tiersNow the browser tab title updates as you navigate the embedded editor. If you're working on a tab called "Sensor Flow", your browser will show
Node-RED: Sensor Flow - FlowFuse. This works for both hosted and remote device instances, and also updates when you navigate into a subflow.If you work with multiple editors open at once, you can now tell exactly what's open in each tab without clicking through.
Previously, the title stayed generic — something like
Instance - Editor - FlowFuse— regardless of which canvas tab was active. If you had multiple embedded editors open in different browser tabs, there was no way to tell them apart at a glance.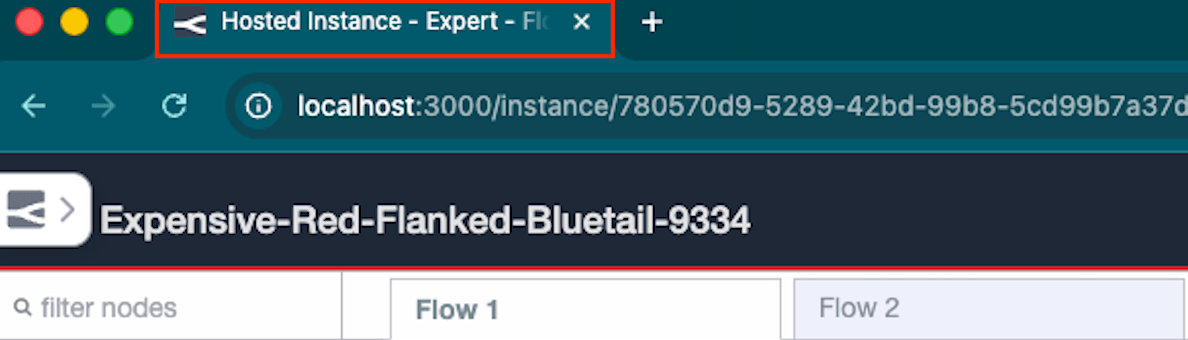
This feature requires Node-RED Assistant v0.12.0 or later. If you are on an older version of the assistant, the title will not update.
This change is live on FlowFuse Cloud. Self-Hosted users will receive it in the next release (v2.29).
-
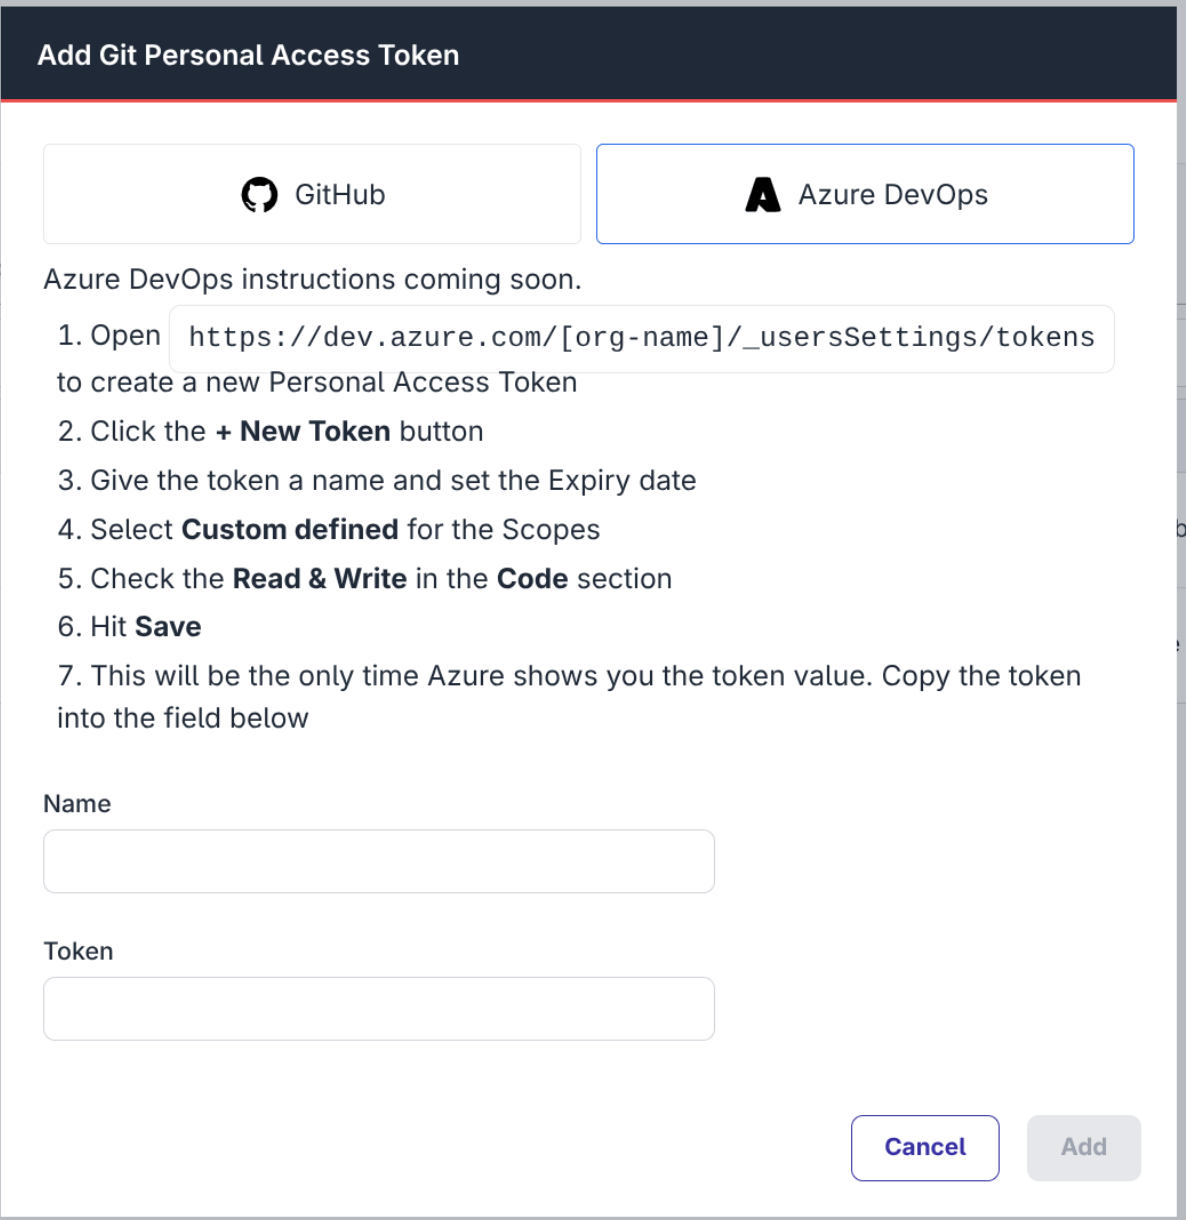
Azure DevOps Pipeline support
Cloud Pro+Self-Hosted EnterpriseDevOps Pipeline Git Stages now support Azure DevOps repositories alongside GitHub.
If your team already uses Azure DevOps for CI and code review, you can now push and pull Snapshots directly as part of that workflow — no need to manage your Node-RED flows outside your existing tooling.
Add Personal Access Tokens under Team Settings → Integrations
Pro and Enterprise customers on FlowFuse Cloud and Enterprise licensed Self Hosted users can use Azure DevOps repositories in their Pipelines from v2.29.
-
As part of our ongoing efforts to maintain our infrastructure, we need to update some of our servers that host Node-RED instances.
This will require restarting any hosted Node-RED instances running on those servers, leading to a short downtime whilst they restart. Remote instances on the edge are unaffected.
We will complete this migration during a 2 hour maintenance window starting at 8am UTC on Saturday 28th March 2026.
Note: the original version of this post had the incorrect date. The mainteance is scheduled for Saturday 28th March.
Will my instances be affected?
If your instance was created after 11th March 2026, or has been updated to the 2.28 release, it will already be running on the new servers.
Otherwise, you can take action to migrate your instance before the scheduled maintenance window at your own convenience.
If you manually suspend and restart your instance, or upgrade to 2.28 at any time before the maintenance window, your instance will not need to be restarted and no further action will be needed.
You can find the "Suspend" option from the "Actions" drop down menu on the Instance Overview page. Once the Instance reports being in the Suspended state, you can select "Start" from the same drop down menu.
We will be emailing notifications to all team owners who have instances that require a restart.
Enabling Scheduled Maintenance Mode
Keeping instances up to date is an important task to ensure they are running with the latest features and security fixes. FlowFuse provides the ability to select a time for updates to be automatically applied to your instances. You pick which day of the week and time the platform can schedule updates in. This removes the burden for keeping things up to date.
On FlowFuse Cloud, Starter teams already have this feature enabled for their instances to apply updates at the weekend.
Pro and Enterprise teams can opt-in on the Instance Settings - Maintenance page.
More information is available in the scheduled maintenance changelog entry.
-
FlowFuse Expert: Helping you make sense of your debug log
Cloud All tiersSelf-Hosted Enterprise (on request)As a flow developer, you know how frustrating it can be to have a bug or issue in your flows. You add a ton of debug nodes and add warning alerts to your functions to try and help you track it down. The logs can be a great source of information but you still need to figure out why it is happening! Why am I getting this error? Where did this log come from?
Now, you can ask the Expert!
We have added the ability to include individual log entries and a quick-add selection on the Resource Selector. Adding these logs alongside the related flows can further focus the AI on the issue and help you solve it.
Key Highlights:
- Laser Focus: Select individual log entries to provide specific context.
- Quick Add: Use the Resource Selector button to instantly pull in logs.
We are sure you will love this feature - and there is more to come too!
For more details, see Debug Context.
-
FlowFuse Expert: Never Miss an Update
Cloud All tiersSelf-Hosted Enterprise (contact us)The Expert now shows a banner in the chat area when a newer version is available. One click and you are up to date.
FlowFuse Expert is updated regularly with new capabilities. This makes sure you always know when there is something new to try, without having to check manually.
For more details, see Keeping Expert up to date.
-
Set Node.js Options for Remote Instances
Cloud All tiersSelf-Hosted All tiersFlowFuse Device Agent v3.8.1 adds support for setting Node.js command line arguments for Remote Instances.
This allows things like:
- Setting the Node.js heap size for memory-intensive flows
- Enabling
--use-openssl-ca(Linux) or--use-system-ca(Windows and macOS) to use private CA certificates
Node.js options can be configured in two ways:
1. Via the device agent command line
Use the
--node-optionsargument. This argument may be specified multiple times:flowfuse-device-agent -c /opt/flowfuse-device-agent/device.yml \
--node-options='--max-old-space-size=256' \
--node-options='--use-openssl-ca'2. Via the
device.ymlfileAdd a
nodeOptionssection:deviceId: xxxxxxx
forgeURL: https://app.flowfuse.com
token: xxxxxxxx
credentialSecret: xxxxx
nodeOptions:
- '--max-old-space-size=256'
- '--use-openssl-ca'For more details, see Configuring Node.js Options.
Join us at Hannover Messe 2026
- Live demos + hands-on workshop with Nick O'Leary
- 12 short talks on real industrial use cases
- Limited spots